Pixlr Tutorial Overview: How to Edit Photos Like a Pro
Introduction to Pixlr
Need quick photo fixes without software? We’ve got you covered. Pixlr operates right in your browser—no installations, no waiting.
It even supports powerful AI tools for sharpening and enhancing images, as explained in this AI Photo Enhancer comparison. Whether you’re polishing vacation snaps for Facebook, prepping portfolio shots, or just enhancing casual phone pics, this tool adapts to your needs.Never edited before? Don’t panic. Our platform offers two straightforward paths. Go pro with Pixlr Editor’s precision controls or breeze through quick touch-ups using Pixlr X. I’ve designed both interfaces to stay intuitive—no maze-like toolbars here.
Trim unwanted elements from images. Brighten underexposed moments. Resize visuals for Pinterest or Twitter posts. Our toolkit handles basics and creative experiments equally well—blend multiple images, refine facial textures, play with stickers. If you can imagine it, you can build it here.
The best part? No premium gear required. Say goodbye to expensive purchases and system requirements. Got internet? Start editing now. While we offer free access to core features, heavy users might appreciate our affordable premium add-ons.
That’s why photographers and novices alike trust this solution. We’ve combined simplicity with professional-grade tools in one browser tab. Stick around—I’ll share time-saving techniques that elevate ordinary shots to gallery-worthy pieces using basic functions. Check out our top editing tricks later in this guide.
Getting Started with Pixlr Editor
Looking for free photo magic? I recommend Pixlr Editor. It’s that rare tool that gets you pro-level results without needing a manual – works whether you’re just starting out or already know your way around editing tools. All through your web browser.
Getting started takes seconds. Just head to their website, click "Open Pixlr Editor" – you’ll see three clear paths forward: start fresh, upload your own pics, or pull images from web links. Each option dumps you straight into the action zone. No fuss, no confusing menus.
What you’ll love? The workspace makes sense immediately. You’ll find tools arranged logically where you’d expect them – basic stuff on the left like classic editing programs, fancy filters up top. Drag sliders, click buttons, watch your image transform as you work. Instant feedback means you learn by doing.
Here’s what impresses me most: the layering system. Think digital tracing paper – tweak specific areas without messing up the whole picture. Need to test ideas? Add new layers through the menu (works like stacking transparencies). Original stays safe while you experiment.
When saving your masterpiece, choose what fits. The options cover all bases – JPEG for sharing, PNG if you need see-through backgrounds, PXD files to keep layers editable. I usually suggest sticking with JPEG or PNG – plays nice with phones and social apps. Old-school BMP’s there if you want it, but who uses that anymore?
No credit card needed, ever. I’ve watched this editor bridge the gap between basic filters and serious retouching. Clean layout helps newbies dive in, while layered editing satisfies pros. That’s why I keep recommending it – grows with your skills, handling everything from quick social media tweaks to full-blown digital art projects. Want insider tricks? I’ll show you smarter ways to edit later in this guide.
Basic Photo Editing Techniques in Pixlr
Need to jazz up your photos? I’ve found Pixlr works like magic in your browser – even your iPhone 15 shots get that extra sparkle. Those fancy cameras catch every little detail, but sometimes you want to polish what’s already there. Let me show you how.
No apps, no hassle. I edit right on my iPhone 15 after taking shots – no computer needed. The screen’s sharp enough to spot dust specks, so tweaking feels like using pro gear.
Crop and Resize in Pixlr
First things first – cut the clutter. I grab the crop tool from the left side (look for the square icon). Drag the edges to focus on what matters, then punch in exact sizes for Instagram or prints. Done? Hit save. Takes 10 seconds.
Adjust Brightness and Contrast in Pixlr
Here’s my go-to trick: the Brightness/Contrast panel. Under the "Adjust" menu, you’ll find two sliders. Pull the brightness up if your beach photo looks gloomy, or boost contrast to make sunset colors pop. Watch the image change as you move them – stop when details in shadows or bright spots look right.
We’ve all had those demon-eye photos. I click the red-eye tool (it’s in the toolbar – looks like an eyeball). Match the brush size to the pupil, tap the red spot, and boom – natural peepers again. Mess up? Hit undo and try smaller brush strokes.
Remove Red Eye in Pixlr
These quick fixes are your editing foundation. I’ve seen newbies nail professional-looking results in minutes. Once you’re comfy here, layer blending and skin retouching become way easier. Pro tip: Save different versions (File > Save As) to compare edits later.
Shortcuts! Press C for crop, B for brightness – saves me hours yearly. The more you tinker, the faster you’ll get. Start with these basics, then check out my advanced tricks section once these feel automatic. Your camera roll’s about to level up.
Advanced Photo Editing Techniques in Pixlr
Think free tools can’t handle serious edits? I’ve proven that wrong using Pixlr Editor. Let’s unlock features that turn basic shots into gallery-worthy pieces – no subscriptions, just browser power.
Forget basic sliders. I use the curve tool like a piano – push the diagonal line up to rescue murky shadows, bend it down to tame blown-out skies. Click anywhere on the graph to pin specific tones. Last week, I revived a backlit portrait by tweaking just the midtones – made the subject’s face glow without wrecking the sunset behind them.
That telephone pole ruining your landscape? Hold Alt (Option on Mac) to sample clean sky, then paint over the wires. Pro tip: I change sampling spots every few strokes to avoid obvious repeats. Works magic on skin blemishes too – sample clear cheek areas to cover zits seamlessly.
The liquify tool’s my secret for subtle tweaks. Drag jawlines inward slightly, widen smiles by 5% – changes so small nobody notices, but the photo feels “better.” Warning: Overdo it and faces turn creepy.
Start small. Try adjusting one curve point daily. Mess up? Ctrl+Z (Cmd+Z on Mac) saves you. I keep a “playground” folder of test images – perfect for experimenting without pressure.
Open Pixlr Editor now. Import any photo and try just one technique from above. See that? You’re already leveling up. Stick with me – next I’ll show you how to combine these tools for mind-blowing composites. Free software, pro results.
Using Filters and Effects in Pixlr
I’ve found Pixlr’s filters work like magic wands for instantly upgrading photos. With a few clicks, casual snapshots turn pro-level—no fancy skills needed. Their preset filter packs are lifesavers for quick fixes: colors auto-correct, styles switch in seconds, even my grandma could figure it out.
Their category system just makes sense. Want vintage vibes? Pick filters adding sepia tones and gritty film textures. Black-and-white options don’t just drain color—they smartly boost contrast to make subjects pop. Bad lighting? Temperature sliders fix weird hues or create sunset warmth fast.
How to use it? Open your image and hit the Filter dropdown menu. Options like "Artistic" add painterly touches, while "Dramatic" deepens shadows for cinematic flair. The live preview’s my favorite part—test filters like trying outfits, undo mistakes instantly.
Every filter’s adjustable with simple sliders. Drag to dial intensity up or down. Last week I tweaked a travel photo at 50% strength—kept natural skin tones while amplifying golden hour glow. This fine-tuning stops that fake, overedited look.
The Effects tab hides more gems. Vignette tools darken edges to spotlight faces. Background blur’s perfect for portrait touch-ups. Recently obsessed with the watercolor effect—makes coffee mugs look gallery-worthy. Border options? Surprisingly cool for adding hand-drawn edges to Instagram posts.
Biggest shocker? Their background remover rivals desktop software.
If you're looking for an even more advanced solution, check out this Adobe Background Remover guide to compare. Auto-detection crisply isolates subjects—saved me hours on product photos. Mess up? Fix edges with a quick brush swipe. Looked intimidating at first, but easier than most phone apps.These tools combine like editing Swiss Army knives. Casual users nail social media posts in three clicks. Designers layer effects for custom looks—last week I accidentally mixed film grain with color grading, nailing that ’90s photo album vibe. Happy accidents happen often, keeps things fun.
Truth is, Pixlr makes pro tools feel like building blocks. Every change happens live, no penalty for experimenting. Next I’m teaching friends to stack effects—try motion blur plus chromatic aberration for cyberpunk styles. Three minutes, instant wow factor. Changed my whole view on web editors—who says browsers can’t handle serious creative work?
Working with Layers in Pixlr
When you learn to use layers in Pixlr, you can do way more with your photos. It’s like putting stickers on clear sheets—you can edit one sticker without messing up others. This keeps your original image safe while you experiment.
Hit the '+' button in the layers panel (or press Ctrl/Cmd + Shift + N) to create new layers. I always rename mine by double-clicking the default names—it saves headaches when working with 5+ layers. Pro tip: Name them stuff like "Skin Retouch" or "Text Overlay" so you don’t get lost.
Adjusting Layer Opacity with Pixlr
That opacity slider’s magic. Slide left to make layers ghostly for blending textures, keep it at 100% for solid edits. Last week I set a texture layer to 30% to make skin look natural while keeping my background sharp.
Grab the move tool (top-left arrow icon) to drag layers wherever. Hold Ctrl/Cmd while dragging to snap elements into perfect alignment. I use this constantly—like lining up text over product photos or building Instagram collages.
When you’re sure about edits, merge layers with Ctrl/Cmd + E. But here’s what I do: Keep the original layers as backups until you’re 100% done. Once merged, you can’t tweak individual parts anymore—like baking a cake you can’t un-mix.
This changed my editing game. Click the mask icon (looks like a square with a circle) to hide parts of a layer. Paint black to erase, white to bring back. I use this daily—like hiding acne without wiping the whole skin layer, or blending product shots into new backgrounds.
While initially complex, layered editing becomes intuitive through regular use. Separate adjustments for color grading, object removal, and text additions prevent overlapping errors. The system’s non-linear approach encourages creative experimentation, as any layer can be modified or hidden later without impacting other elements.
At first it feels like juggling, but layers soon become your best friend. Keep color fixes on one layer, text on another. Messed up? Just hide or adjust that single layer. No more "undo" spamming!
These tricks turn basic edits into pro work. Whether adding watermarks or mixing multiple photos, layers let you build edits step-by-step. Next time I’ll show real examples—like fixing overexposed skies while keeping foregrounds crisp, or making those trendy double-exposure portraits.
Retouching Photos in Pixlr
I’ve been using Pixlr’s photo touch-up tools to make profile pics look pro without going overboard. Their fixes keep skin real while zapping flaws—perfect for LinkedIn headshots or dating app photos.
The spot fixer’s my go-to for quick cleanups. Click a clear skin area near the pimple, brush over it, and boom—acne disappears like magic. Works great on stray hairs too. Trick: Use tiny brush sizes for nose areas to avoid blurring pores.
That clone stamp’s saved me from photo bombers. Hold Alt to copy good skin, then paint over moles or background crud. Pro tip: Sample from multiple spots to avoid obvious repeating patterns. Last week I erased a photobombing seagull from my beach pic!
The blur brush is sneaky-good. Keep strength around 30% to soften wrinkles without making faces look plastic. I usually paint around eyes and forehead, leaving natural texture on cheeks. Avoid overdoing it—nobody wants that creepy doll skin look.
Lighten/darken brushes are contouring for poor people. Brighten eyeballs and teeth subtly with the lighten tool. Darken tool defines jawlines or makes eyeliner pop. Gradual buildup is key—I do 5-10 passes at 15% strength instead of one heavy swipe.
Secret sauce? Pixlr shows changes live so you don’t wreck photos. Work in layers—keep original pics untouched below your edits. Last month I accidentally turned someone’s face orange, just trashed the bad layer and started fresh.
It takes practice. Start with well-lit photos, try different skin tones. Auto filters are okay, but manual tools let you fix specific issues—like reducing nose shine while keeping cheek highlights. My golden rule: Edit, walk away, check later with fresh eyes. Most “perfect” edits look crazy after coffee breaks.
Adding Text and Graphics to Photos in Pixlr
Adding Text to Your Photos with Pixlr
Click the "T" button, tap your image, and start typing. I flip through fonts like channel surfing—classic Times New Roman for serious stuff, bubbly scripts for birthday cards. Make text huge with the size slider or see-through using opacity. Pro tip: Bright yellow text over dark areas grabs attention without blocking the photo.
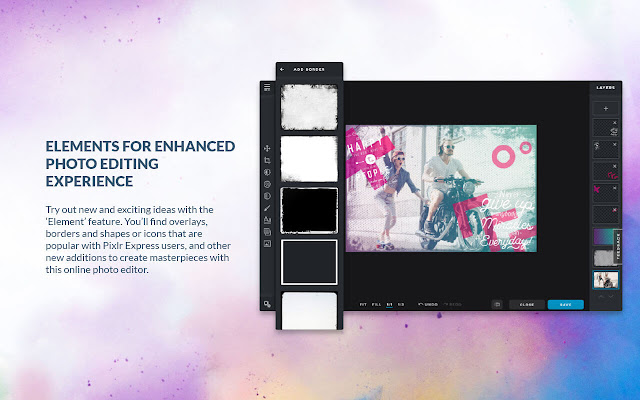
Adding Graphics to Your Photos with Pixlr
Found the secret sauce in Pixlr’s shape library. Arrows point out details in product shots, speech bubbles make memes pop. All graphics act like sticky notes—drag corners to resize, rotate, or toss in the trash. Last week I made a concert flyer using star stickers that glowed against a night sky photo.
Text floats above graphics like oil on water. Right-click to copy designs—saves time when making matching Instagram story slides. My go-to move: Select multiple elements and align them in one click. No more crooked text boxes!
Combining Text and Graphics with Pixlr
Best combos happen by accident. Try putting semi-see-through text over patterned backgrounds—reads better than solid colors. Add tiny shadows under letters to stop them from looking flat. Mix font styles like a pro: Bold title + simple subtitle + handwritten date.
These tools let me design merch logos and YouTube thumbnails without Photoshop. Auto-save’s a lifesaver when my cat walks on the keyboard mid-design. Export keeps quality crisp whether I’m printing posters or posting TikTok clips.
Final Thoughts about Pixlr
Pixlr turns photo tweaking into full design projects.
For inspiration, see how other AI-based tools like Copy AI empower creativity in content design. Learn layout basics by playing—balance big elements with small details, contrast bright colors with muted tones. Next time I’ll show how to make trending quote posts: sunset background + white text + subtle shadow effect. Spoiler: It’s easier than making avocado toast.Saving and Exporting Photos in Pixlr
When I finish editing, Pixlr makes saving and sharing stupid easy. Their export options act like a Swiss Army knife—different tools for different jobs, whether you're posting to Instagram or printing posters.
Always hit "Save As" first—lets you make copies without messing up originals. JPEG’s my go-to for web stuff, PNG when I need transparent backgrounds (like logos). Pro tip: Name files clearly—"BirthdayFlyer_v2" beats "final_final_REALfinal.jpg".
That quality slider’s crucial. Drag it up to 90% for crisp prints, down to 60% if you’re emailing pics—files get 3x smaller. Watch out for blurry spots in sky areas when lowering quality. I usually test at 100% zoom before exporting.
The Instagram/Twitter buttons are lifesavers. Auto-resizes images perfectly—no more cropped profile pics. Last week I made a TikTok thumbnail that looked sharp even at tiny sizes. Bonus: Remembers your last used settings.
Share button hooks right into Gmail. Attaches optimized files that won’t clog inboxes—perfect when clients need quick previews. I use this when my grandma wants to see family photos but can’t handle large files.
Downloading keeps full quality for important work. I save PXD files (keeps layers!) for client projects, then export JPEGs for sharing. Changed where files save? No problem—choose folders like “Portfolio” or “Client_Drafts” during download.
What I love: Files open anywhere. PXDs let me re-edit layers later in Photoshop. Sent a PNG to my Android friend? Opens fine. Printed a JPEG at CVS? Looks pro. Cloud saving means I can start edits on my laptop, finish on my phone.
Pixlr cuts through tech jargon. Focus on making cool stuff instead of wrestling with file types. Need more power? I sometimes export to PicWish for background removal magic.
You can also try this Pixlr editing tutorial for step-by-step editing support. But honestly, 90% of my needs get covered right here. Game-changer for quick meme-making or serious design work.