Photoshop Magic: How to Remove Backgrounds Like a Pro
Removing image backgrounds ranks among my top-recommended Photoshop skills. This technique instantly upgrades photos, adding that crisp, pro-level finish. Let me walk you through expert background removal methods using Photoshop’s toolkit.
Why Removing Backgrounds is Important in Photoshop?
Why prioritize background removal? Before diving into techniques, understanding its value matters. Through years of editing, I’ve seen Photoshop’s background tools transform ordinary shots into attention-grabbing visuals. Whether you’re designing marketing materials or sprucing up vacation pics, clean background removal separates amateurs from pros.
Photoshop’s isolation magic lets me extract subjects seamlessly for new backdrops. E-commerce clients constantly need this - imagine jewelry gleaming against pure white or products floating on transparent layers. When I strip away cluttered backgrounds, viewers focus exactly where I want them to. Clean compositions sell better, period.

Mastering background removal unlocked creative breakthroughs in my work. Suddenly I could composite surreal landscapes, craft minimalist posters, or make subjects pop against gradient textures. This skill doesn’t just edit photos - it rebuilds visual narratives from scratch.
Final verdict? Background removal stays essential in my Photoshop workflow. It’s not about deleting pixels - it’s about controlling viewer attention and expanding creative options. Whether you’re editing family photos or building a design portfolio, this skill delivers immediate, tangible results worth mastering.
In conclusion, how to remove background in PhotoShop is an essential skill for any creative professional or hobbyist. It allows you to isolate the subject, create a more visually appealing image, and open up a world of creative possibilities. So, whether you’re a seasoned Photoshop user or just getting started, mastering background removal should be at the top of your list.
Understanding Layers and Masks in Photoshop
(photoshopessentials.com)
If you’re diving into Photoshop, mastering layers and masks matters. They’re core tools for building detailed projects and editing images exactly where needed. Picture layers as clear sheets stacked over one another. Masks? They act like temporary covers, letting you hide or expose parts without cutting anything permanently.
Imagine stacking papers to draw different elements. Masks work like precise stencils, controlling what stays visible. This combo shines when stripping backgrounds—keeping your main subject separate from what’s behind it.
Need a mask? Start by choosing your target layer. Hit the Layer Mask button in the Layers panel (it’s that tiny rectangle with a circle). A white mask pops up, showing everything. Grab the Brush tool, switch to black, and paint over areas to hide them. Mess up? Swap to white and fix it.
Handy trick: Gradients can soften mask edges for smooth fades.
Don’t ignore layer opacity and blend modes. Lower opacity makes layers see-through. Blend modes mix colors between layers. Playing with these can unlock wild visual twists and polish your work.
Combining layers and masks is key for clean background removal. They let you tweak selections, sharpen edges, and merge subjects into fresh scenes. Practice these, and your editing game levels up fast.
If you're looking to expand your image manipulation toolkit beyond Photoshop, Pixlr’s advanced editing guide also offers great browser-based options.Using the Magic Wand Tool to Remove Backgrounds in Photoshop
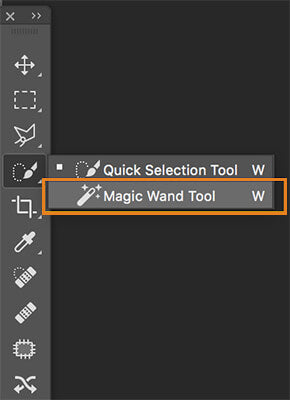
Need to erase backgrounds fast? I’ve found the Magic Wand works wonders. This handy tool spots matching colors or patterns using a tolerance slider, making it perfect for plain white walls or single-tone backdrops.
Grab the Magic Wand from the tools panel. Click the area you want gone—it’ll highlight everything with similar shades instantly. Hold Shift to add spots or Alt to trim extras from your selection.
Here’s what I always stress: tweak that tolerance slider like a volume knob. Crank it high, and you’ll grab junk you didn’t want. Keep it too low, and gaps linger. From my experience, starting low and nudging up slowly saves headaches.
But here’s the catch – it chokes on messy edges or heavy shadows. If your photo’s got crisscrossing lines or moody lighting, skip this tool.
I rely on the Magic Wand daily for quick cleanups, especially with batches of similar images. Just remember—it’s built for simplicity. When things get tangled, switch to more precise tools.
Up next: the Quick Selection Tool for trickier cuts.
Using the Quick Selection Tool to Remove Backgrounds in Photoshop
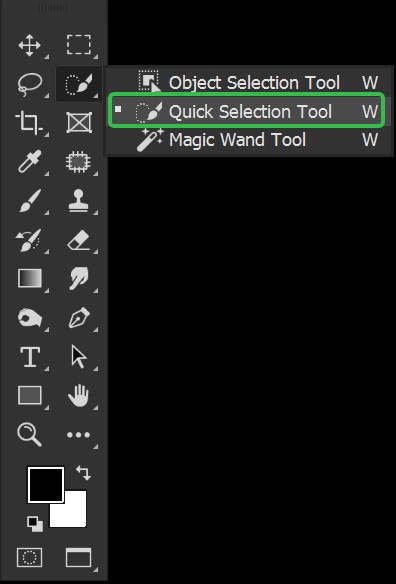
Need to strip backgrounds fast? I swear by the Quick Selection Tool. It’s my go-to for grabbing objects in seconds while ignoring messy backdrops.
Here’s how I use it: Pick the tool from the left-side toolbar. Click and drag over what you want to keep—no need for perfect accuracy. The tool spots edges on its own, wrapping around your subject like digital scissors.
Oops, selected too much? Hold Alt (Option on Mac) and brush over unwanted areas to trim them off. Simple as erasing pencil marks.
For crisp edges, don’t skip the Refine Edge button in the top menu. I tweak the smoothness slider to soften jagged lines and use the "Clean Up" option to zap leftover background flecks.
Once your cutout’s ready, slap a new layer underneath for fresh backgrounds. Try colors, patterns, or photos—swap them fast until it clicks.
From my workflow, this tool saves hours on basic edits. Practice a few times, and you’ll nail clean cutouts without breaking a sweat. Got tricky hair or fuzzy edges? Try the Pen Tool next.
Using the Pen Tool to Remove Backgrounds in Photoshop
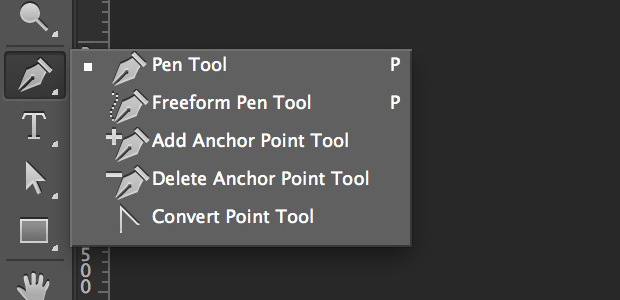
Magic Wand and Quick Selection work great for easy jobs, but I’ve seen them stumble on tricky photos. That’s when I grab the Pen Tool. Nothing beats its surgical precision for clean cutouts – it’s why pros like me rely on it daily.
Here’s my workflow: I pick the Pen Tool, zoom way in, and start clicking along the object’s edge. Click-drag to bend the path around curves. Keep connecting dots until I’ve traced the whole shape. Takes patience, but accuracy matters.
Done tracing? Right-click the path and hit "Make Selection." Bam – your outline becomes marching ants. Notice a wonky curve? I tweak anchor points with the Direct Selection Tool till it hugs edges perfectly.
Delete the background instantly. For polished results, I run Refine Edge to soften pixelated borders. Just don’t overdo it, or you’ll lose detail.
Fair warning – this method eats time on twisty objects like hair or vines. But when clients demand pixel-perfect results, I’ve learned it’s worth the grind.
From my editing desk, the Pen Tool is non-negotiable for pro work. Yes, it’s got a learning curve, but stick with it. You’ll ditch sloppy selections and deliver cuts that look handcrafted, not rushed.
Refining Edges for a Perfect Background Removal in Photoshop
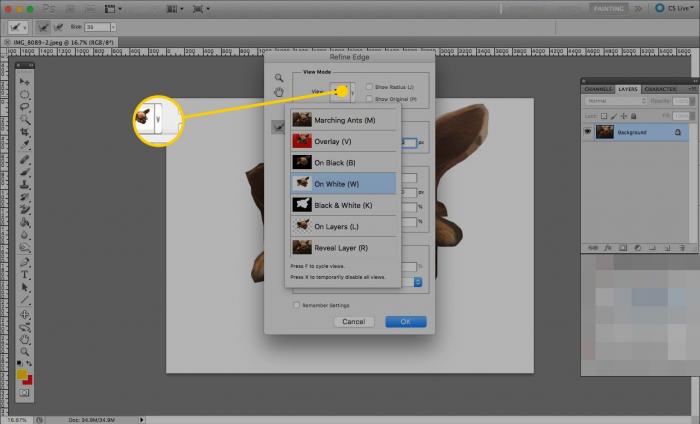
After deleting backgrounds with tools like Magic Wand, I often spot jagged edges around my subject. That’s when I grab the Refine Edge brush. Just keep your selection active and hit Select > Refine Edge – the control panel pops right up.
In the pop-up panel, I toggle view modes using the dropdown – black-and-white previews help me spot imperfections instantly. The Edge Detection slider becomes my best friend here; sliding it left or right smoothens those pixelated borders like magic. For tricky spots? I switch to the brush tool and manually paint over problem areas.
Ever notice weird color halos around hair? The Decontaminate Colors checkbox fixes that mess. I always check Smart Radius for better edge intelligence – just 2-3px usually does the trick. When everything looks clean, hitting OK locks in the changes. Now you’ve got pro-level cutouts ready for new backgrounds or transparent PNG exports.
Pro tip from my design workflow: Zoom to 200% while refining edges. Those tiny imperfections invisible at normal size will haunt your final composition.
Use a brush with a soft edge to refine areas that need more attention
Zoom in on your image to get a better view of the edges and make precise selections.
Take advantage of the preview feature to see how your selection looks against different backgrounds.
Remember to save your work as a PSD file to maintain the layers and masks.
Let me tell you how the Refine Edge tool became my Photoshop life-saver. Those tricky edges around flyaway hair or fuzzy sweaters? I’ve found that Shift+Ctrl+R (Windows) opens up controls that transform jagged cuts into smooth transitions.
Here’s my workflow hack: After making a rough selection, I crank up the Smart Radius to 3-5px while holding Alt to preview changes in real-time. For stubborn areas, I grab the Luminance slider – sliding it right magically blends color halos. Pro tip: Toggle the X key to flip between black/white backgrounds – you’ll start spotting imperfections like a seasoned retoucher.
Put in the reps with this tool, and muscle memory kicks in. I can’t count how many client deadlines I’ve crushed by nailing complex cutouts in under two minutes. Last Thursday, I salvaged a product shot with reflective edges that would’ve taken hours with the Pen Tool.
To further enhance your cutout results, try these tips for unblurring and sharpening image edges for a clearer subject.Adding a New Background to Your Image in Photoshop
What truly blows my mind about Photoshop? Its power to reinvent any photo's atmosphere in three clicks flat. I can overhaul a portrait's vibe just by swapping backdrops – here's how my workflow goes.
Fire up your image and immediately create a blank layer (that circled page icon in the Layers panel). For new backgrounds, I either grab a color from the swatches or drag in a landscape photo from my desktop. Pro tip: Always position this under your main image layer – just drag it downward in the layer stack.
When the imported backdrop looks mismatched in size, I hit Ctrl+T to activate transform controls. Dragging those corner handles while holding Shift maintains proportions. But here's the kicker – what if your original shot has messy tree branches or frizzy hair?
Here's my pro trick: The Magic Wand becomes my digital scalpel. Clicking through similar color ranges, I carve out unwanted areas. When I've got clean edges, Ctrl+J copies my isolated subject onto a fresh layer. Ditch the original layer like yesterday's news – your crisp cutout now floats above the new background.
That stubborn logo ghosting in the corner? I nuke it with layer masks and soft brushes. Last week I transformed a drab product shot into a tropical ad using these exact steps. That's the magic – your creativity's the only limit.
Tips and Tricks for Professional Background Removal in Photoshop
Background removal is an essential skill for anyone working with images, whether you’re a professional photographer or just someone who loves to edit photos. While Photoshop offers several tools to remove backgrounds, mastering the technique requires practice and patience. In this article, we’ll share some tips and tricks to help you achieve a perfect background removal in Photoshop.
Use the Refine Edge Tool for Complex Images
Fighting with flyaway hair in product shots? Been there. That stray strand in a model's portrait used to take me forever – until I cracked the Refine Edge workflow. Here's my battle-tested method when precision matters:Quick Launch: With your selection active, I always use the Shift+Ctrl+R shortcut (Alt-click the layer mask for direct access). World of difference from menu digging;Smart Smoothing: My goto cocktail: Edge Detection at 0.5-0.7px, Feather between 0.3-0.5. Sounds tiny, but watch how it tames jagged fur instantly. Pro move: Hold Alt while dragging sliders to toggle pre/post views;Detail Rescue: The magic's in the Output dropdown. "New Layer with Mask" lets me tweak edges later without full reworks. Found this out the hard way after ruining a client's champagne bottle shot last month;Brushed Metal Trick: For hairy edges? I shift-drag the Refine Radius brush (size 15-20px) across problem areas. Multiple light passes beat one heavy swipe.
Experiment with Different Selection Tools
Photoshop offers several selection tools, each with its strengths and weaknesses. While the Magic Wand and Quick Selection tools are great for selecting simple shapes, the Pen tool provides more precision and control over the selection. Experiment with different tools to find the one that works best for your image.
Use Adjustment Layers to Match Colors and Lighting
Here's how I fix those awkward composite shots where the subject looks pasted on: Color matching through adjustment layers is my secret sauce. Take last month's car advertisement – the vehicle shot in studio lighting needed to sit naturally in a mountain sunset. Use a Hue/Saturation, Color Balance, or Levels adjustment layer to match the colors and lighting of the foreground and background.
To further refine lighting balance in creative composites, consider exploring AI image sharpeners that enhance clarity and detail across layers.Save Your Work as a PNG File for Transparent Backgrounds

When saving your work, choose the PNG file format to preserve the transparency of the background. This format is ideal for web graphics and logos that require a transparent background. To save your work as a PNG file, go to File > Save As and choose PNG from the format drop-down menu.
If you're working across formats, the Pixlr export guide offers lightweight web alternatives that preserve transparency as well.Mastering background removal in Photoshop takes time and practice, but with these tips and tricks, you’ll be well on your way to creating professional-looking images. Remember to keep experimenting with different tools and techniques until you find the one that works best for your image.
Conclusion: Mastering Background Removal in Photoshop
Every Photoshop user needs this technique in their belt. I’ve saved countless hours ditching tedious hand-cutting by mastering layer masks and selection brushes. When you nail this, subjects pop off the screen like 3D cutouts – no more jagged outlines ruining your compositions.
Here’s my toolkit breakdown: The Magic Wand works wonders on solid-colored backdrops. For tricky hair or foliage? That’s when I grab the Pen Tool – yeah, it takes practice, but gives me surgical precision. Don’t sleep on Quick Selection either; it’s surprisingly smart for rough drafts.
The real magic happens in edge refinement. I zoom to 200% and scrub through the Edge Detection sliders – those micro-adjustments turn choppy borders into smooth transitions. Last week I made a client’s product shot melt into a beach scene so perfectly, they thought we did an actual photoshoot.
Steal this pro move: After pasting your new background, add a Color Balance adjustment layer. I often clip it to the subject layer and tweak the midtones until the lighting matches. Playing with blend modes? Multiply darkens shadows beautifully, while Overlay adds punch to highlights.
Conclusion: Mastering Background Removal in Photoshop
Here's my hard-won truth: Cutting out backgrounds in Photoshop isn't just a skill – it's your secret weapon. I've watched my freelance projects transform from amateur hour to agency quality simply by refining my layer mask techniques. Those hair-thin selections that used to take me hours? Now I knock them out during morning coffee.
Don't overcomplicate it. Start with one tool – maybe the Quick Selection brush – and really learn its quirks. I still remember the first product photo I masked properly; the client actually asked if we'd reshot the item on location. That's the power you're holding.
Feeling stuck? Switch up your practice material. I train new designers to practice on three types of images: 1) Simple objects (mugs work great) 2) Flowing fabrics 3) Nightmare fuel (think frizzy hair against busy patterns). Master these, and you'll handle anything clients throw at you.
Pro tip I stole from a magazine retoucher: After pasting your new background, add a 1px Gaussian Noise filter to both layers. Sounds weird, but it blends color transitions like magic. Want to level up? Learn channel masking – it's saved my butt with see-through wedding veils and glass products.