10 Tips for Managing Your Apple ID!!
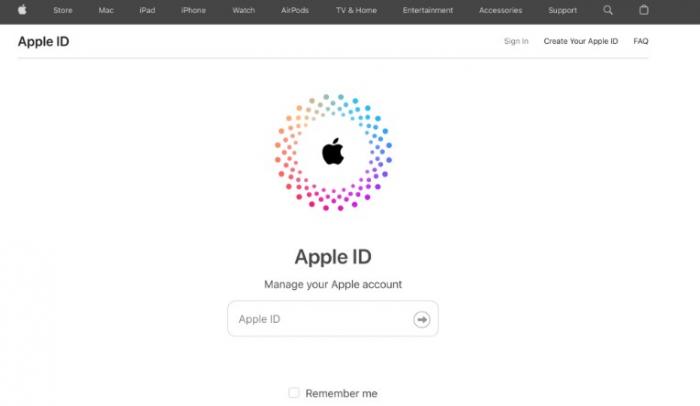
What is an Apple ID
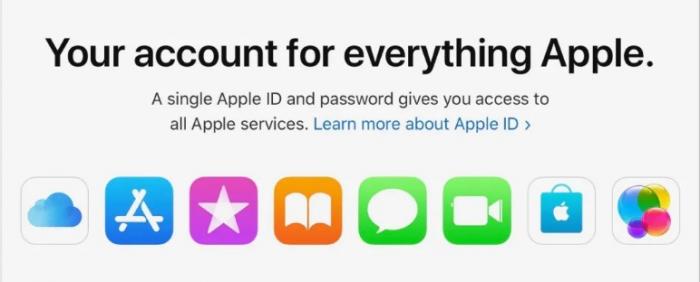
My Apple ID acts like a personal passkey. It lets me dive into everything Apple offers - grabbing apps from their store, streaming tunes, or backing up my photos through iCloud. Think of it as my VIP ticket that connects all my Apple gadgets smoothly.
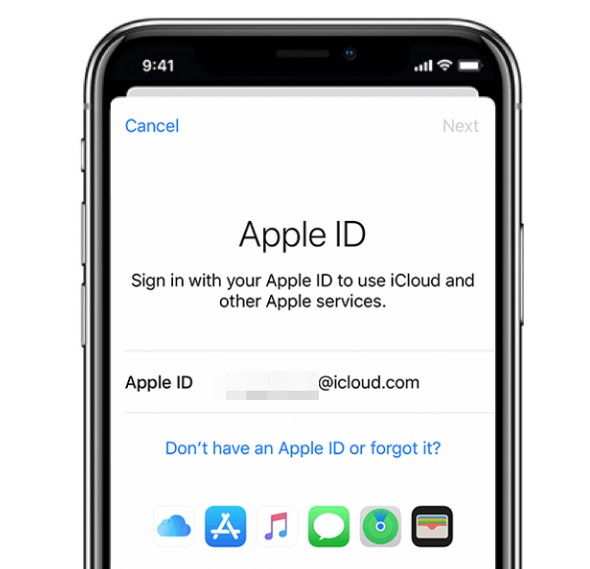
I sign in using my email and a secret code (that password I guard like treasure). This combo keeps my account safe while remembering my favorite settings. It’s why my iPhone automatically knows my payment preferences and why my iPad shows my latest downloads without fuss.
This ID does heavy lifting behind the scenes. I rely on it to find misplaced devices through Find My iPhone or approve logins with that extra security step called two-factor authentication. Every movie I rent or app I buy gets neatly tracked in my purchase history. Honestly, it makes using Apple stuff smoother than buttered toast.
More than just a username, this ID shapes how I interact with my tech. It’s the glue holding my digital life together – syncing my playlists across devices, restoring backups when I upgrade phones, even letting me join beta features. Without it, my Apple gear would feel like half a toolset. With it? I’m clicking, swiping, and creating without friction.
Want to get even more out of your Apple experience? Check out our Yahoo Mail Login: Your Gateway to Productivity and Innovation – it pairs surprisingly well with a finely tuned Apple setup.Why is managing your Apple ID important
Locking down my Apple ID matters more than you might realize. For starters, this single login acts as the master key to my entire Apple world – photos in iCloud, apps I’ve bought, even my Apple TV subscriptions. I treat it like the digital front door to my life, which is why updating security settings ranks high on my priority list.
I’ve learned the hard way that outdated passwords invite trouble. That’s why I religiously refresh mine every few months and never reuse old codes. When Apple introduced two-factor authentication, I turned it on immediately – now even if someone guesses my password, they’d still need physical access to my phone to break in.
Payment methods sneak up on you. Last year I discovered three apps quietly billing my card monthly through Apple Pay. Now I check my subscriptions every time I update iOS. Pro tip: Remove expired credit cards pronto. I once got locked out of downloading free apps because my stored card had expired.
Device syncing works magically – when settings are current. Last month when my iPhone died, having my Apple ID properly set up meant my new device mirrored the old one within minutes. But when I forgot to update my recovery email last year? Let’s just say password recovery turned into a week-long headache.
Bottom line: Treat your Apple ID like your house keys. Update security features before problems arise, scrub outdated payment methods monthly, and double-check recovery contacts. It’s not paranoia – it’s preventing digital headaches down the road.
How to create an Apple ID
I punch in details like my full name (no middle initials – learned that the hard way) and pick an email I actually check daily. Birthdate matters here – Apple blocks under-13s from creating IDs solo. The password game’s crucial: I mix symbols, capitals, and numbers but avoid obvious dates. Pro tip: Jot it down temporarily until my password manager saves it.
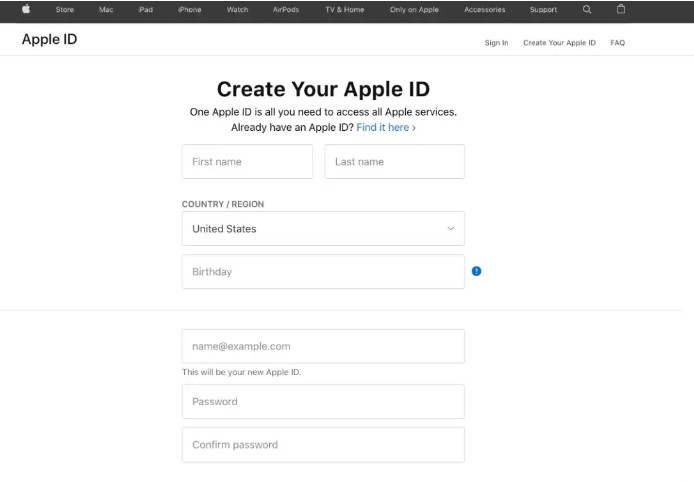
Here’s where newbies stumble. Apple shoots a confirmation code to my email – but sometimes it hides in spam folders. I refresh like crazy until that six-digit code arrives. Once verified, I speed-scroll through the terms (we all do) but pause at payment info. Skipping credit card details works if I’m only after free apps initially.
Security’s the final hurdle. I always add my phone number – not optional if I want app downloads later. Two-factor authentication? Turn it on immediately. Sure, typing an extra code each login feels tedious, but my cousin’s hacked account last year convinced me it’s worth the three seconds.
Boom – the welcome screen appears. First thing I do? Test it by downloading a free podcast app. If that works, my Apple ID’s golden. I sync it across my devices within minutes, double-check recovery contacts, then delete that temporary password note. Total time invested? Less than brewing coffee. Now I’m ready to binge Ted Lasso or backup vacation photos without hiccups.
If you're setting up digital tools across platforms, don’t miss this Shopware Login Walkthrough – perfect for syncing productivity beyond just Apple.Tips for setting a strong password
Crafting ironclad passwords became my obsession after a friend’s Instagram got hijacked. Here’s my battle-tested strategy. Forget “Password123” – I treat codes like Fort Knox entries. My golden rule? Mash together unrelated elements: uppercase letters, random numbers, and symbols sprinkled like chili flakes. “TacoTuesday#7” beats “Summer2023” any day.
I avoid personal crumbs hackers could trace. No pet names, no street numbers, definitely no birthdays. My dog’s name plus my zip code? That’s handing thieves a skeleton key. Instead, I riff on song lyrics or movie quotes – “DontYou4getAboutMe!” works wonders.
Length trumps complexity. I shoot for 14+ characters, weaving phrases even my sister couldn’t guess. “PurpleTigerEats89%Pizza” takes longer to crack than shorter gibberish. Bonus: It’s weirdly memorable.
Rotating passwords matters more than people think. I swap them out quarterly, same as oil changes. Pro move: Update recovery contacts simultaneously. Last April, I forgot and spent hours locked out of my own iCloud.
Two-factor authentication’s my safety net. Even if someone nabs my password, they’d need physical access to my ancient iPod touch (yes, I still keep it charged). Sounds paranoid until you’ve seen a bank account drained via a weak Apple ID.
Final tip: Password managers changed my life. No more sticky notes or reused codes. Mine auto-generates monstrosities like “xQ2$vBp@L9!qW” and remembers them so I don’t have to. Peace of mind? Priceless.
Speaking of digital safety, here's how to Unleash Your Creativity with CapCut's AI Video Tools – because your editing tools deserve the same level of protection.Two-factor authentication for Apple ID
I treat two-factor authentication like my Apple ID’s bodyguard. That extra step? Worth its weight in gold. Hackers might swipe my password, but without physical access to my devices, they’re stuck at the gate. Here’s how I locked mine down.
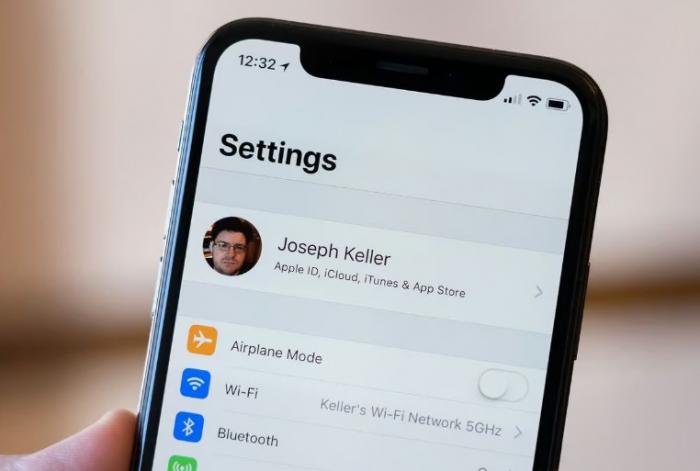
On my iPhone, I dove into Settings, tapped my profile photo, then scrolled to “Password & Security.” The “Turn On Two-Factor Authentication” button glowed like a neon sign. Three taps later, I confirmed my phone number – no way around this part.
Now, any new login attempt triggers a showdown. Say I sign in from my buddy’s laptop. Instantly, my iPhone lights up with “Allow sign in?” If I approve, it dishes a one-time code. No code? No entry. Even my sister couldn’t borrow my iPad last week without me personally approving her request.
I’ve had this active since 2019’s phishing scam scare. Last month, someone in another state tried accessing my account. Got the alert, hit “Don’t Allow,” and changed my password while brewing coffee. Crisis averted before my espresso finished dripping. Pro tip: Keep a backup trusted device – my dusty old iPad mini saved me when my phone died during a cross-country move.
Bottom line? Skipping two-factor is like leaving your front door wide open with a “Steal Me” sign. Takes 90 seconds to enable, costs nothing, and lets you breathe easier. Your future self will high-five you when those “Login Attempt Blocked” emails start rolling in.
How to Update Personal Information on Apple ID
Let me tell you why keeping Apple ID details current saved my bacon last month. I nearly missed a package delivery because my old college address was still linked to App Store purchases. Updating info isn’t just busywork—it’s your safety net when life throws curveballs.
Here’s my drill: On my iPhone, I swipe open Settings and jab at my profile picture like it owes me money. That top menu’s where the magic happens. Under “Name, Phone Numbers, Email,” I nuked my ancient Yahoo address last Tuesday—replaced it with my work email. Apple shot a confirmation code faster than I could check my inbox.
Watch for verification hiccups. When I updated my Canadian phone number last fall, the system initially rejected the +1 country code. Had to retype it three times before it stuck. Lesson learned: Double-check formatting like you’re proofreading a text to your boss.
Region settings matter more than you’d think. Switching from Japan to Canada unlocked local app versions and saved me from 3 a.m. podcast drop notifications. Found this under “Language & Region” while battling insomnia-induced settings tinkering.
Payment updates? Non-negotiable. My expired Visa once blocked me from downloading free apps during a road trip. Now I scrub credit card details monthly under “Payment & Shipping.” Pro tip: Delete old cards even if they’re inactive—clutter invites errors.
I force myself to audit everything quarterly, usually when paying bills. Takes four minutes tops. Outdated recovery emails? That’s how people lose access to decades-old photo libraries. Treat your Apple ID like a living document, not a time capsule.
Last step: Test changes immediately. Updated my name post-marriage? Tried buying a 99-cent ebook to confirm the billing name matched. Small price for peace of mind. Your future self will thank you when account recovery doesn’t feel like solving a Cold War cipher.
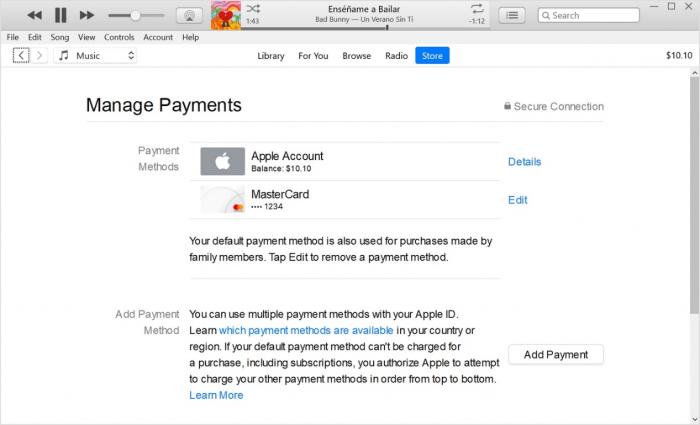
Managing payment methods on Apple ID
Let me tell you why keeping Apple ID details current saved my bacon last month. I nearly missed a package delivery because my old college address was still linked to App Store purchases. Updating info isn’t just busywork—it’s your safety net when life throws curveballs.
I learned the hard way why payment methods need babysitting. Last Christmas, my card expired mid-gift card purchase, freezing my entire App Store access. Now I treat my Apple ID wallet like a real one – no expired plastic allowed. Here’s my survival guide.
Dig into Settings, tap your profile pic, then hit “Payment & Shipping.” This vault holds your digital cash. Adding a new card? I snap a photo of the physical card – Apple’s scanner reads numbers better than my tired eyes. Pro tip: Label cards as “Personal” or “Business” when multiple are stored. Saved me from accidentally expensing a meditation app to my company account.
Security’s non-negotiable. I never save debit cards here – credit cards offer better fraud protection. Two-factor authentication stays ON, acting like a bouncer for every transaction. When my nephew tried buying Robux last summer, the verification code to my Apple Watch stopped him cold.
Subscriptions are silent budget killers. Every iOS update, I check under “Subscriptions” like clockwork. Found three forgotten trials about to charge – including a meditation app I’d used once. Canceling takes two taps now, unlike the old days of phone calls and “Are you sure?” pop-ups.
My golden rule? Scrub old cards monthly. That Visa from my ex-bank? Gone. The PayPal account linked to my old job? Deleted. Fewer stored cards mean fewer fraud chances. Bonus: Forces me to consciously re-enter payment info, keeping purchases intentional.
Final hack: Use Apple ID balance for impulse buys. I load gift cards from trusted retailers, treating it like a digital allowance. When the balance hits zero, no accidental overdrafts. My wallet stays lean, my subscriptions intentional, and my accountant (aka my spouse) stays happy.
Looking to expand your digital wallet skills? Here’s a Step-by-Step Tutorial for Signing Up on Amazon Relay – it’s smoother than you'd expect.How to recover a forgotten Apple ID
Let me tell you why keeping Apple ID details current saved my bacon last month. I nearly missed a package delivery because my old college address was still linked to App Store purchases. Updating info isn’t just busywork—it’s your safety net when life throws curveballs.
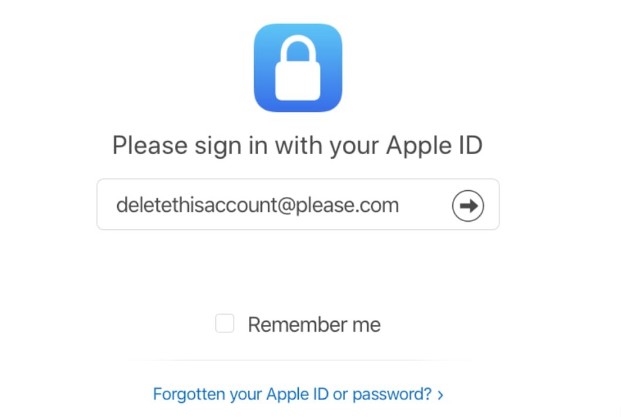
We’ve all been there – that cold sweat moment when your Apple ID password vanishes from memory like car keys in a couch. Last winter, mine slipped my mind during an urgent app update. Here’s how I clawed it back without losing my photos or sanity.
First stop: Apple’s password reset page. I typed every email I’ve owned since 2007 into their recovery form. Turns out my ID was linked to my ancient AOL address (cringe). The “Forgot Apple ID?” button became my lifeline. Pro tip: Check ALL your inboxes – the reset email landed in my rarely-used iCloud spam folder two hours later.
When website methods failed, I turned to the Apple Support app. The “Get Support” tab felt like a 911 call center. Selected “Password & Security,” then white-knuckled through identity verification. They asked about my first iPad purchase date – who remembers 2013 specifics? Thankfully, my receipt lived in Gmail’s archive like a digital safety net.
Desperate times? Apple’s phone support became my Hail Mary. After 22 minutes on hold listening to synth covers of Beatles songs, a rep walked me through account recovery. Had to recite my backup codes (thank God I’d saved them in my fireproof safe) and confirm recent purchases. That $1.99 weather app purchase proved I was legit.
Post-recovery ritual: I immediately updated my security questions. “First pet’s name” changed from obvious “Fluffy” to “Mr. Sniffles2004” – specific enough to remember, weird enough to stump hackers. Enabled two-factor authentication that same hour.
Final lesson? Store recovery keys somewhere smarter than your Notes app. I now keep mine etched on a metal card in my wallet, right behind my insurance info. Because when your digital life hangs by a password, analog backups become priceless.
Managing iCloud storage for your Apple ID
Let me tell you why keeping Apple ID details current saved my bacon last month. I nearly missed a package delivery because my old college address was still linked to App Store purchases. Updating info isn’t just busywork—it’s your safety net when life throws curveballs.
Cloud storage headaches? Been there. My iPhone’s “Storage Full” alerts used to hit like clockwork every vacation. Now I treat my 5GB free tier like a Tetris game – here’s my survival playbook.
Crack open Settings, tap your profile, then dive into iCloud. That color-coded storage bar doesn’t lie. Last month, mine revealed 3GB of abandoned voice memos from 2018. Deleted them faster than expired yogurt. Pro tip: Screenshot your storage breakdown monthly – patterns emerge.
When my kid’s ballet recital videos maxed out my free space, I caved and upgraded to 50GB for $0.99/month. Cheaper than my latte habit. Found the “Change Storage Plan” button hiding under Apple ID settings like a shy raccoon.
Backups are sneaky space eaters. I disabled my old iPhone 8’s backups (collecting digital dust since 2020) and reclaimed a gigabyte. Now I manually back up before major iOS updates only – like snapping a photo of your suitcase before a trip.
iCloud Photo Library became my hero. Enabled it during a Yellowstone trip, letting me ditch 800 RAW files from my phone while keeping them accessible on my Mac. The “Optimize iPhone Storage” toggle? Flipped it on and magically freed up 12GB.
My purge ritual: Every equinox, I nuke unused app data and review iCloud Drive. That novel draft from 2016? Archived it offline. Family shared albums? Consolidated duplicates into one.
Final hack: Create storage alerts. Using Shortcuts, I set my phone to nag me when iCloud hits 90% capacity. Annoying? Yes. Effective? Stopped three storage crises this year. Your future self will thank you when capturing that surprise proposal video without “Storage Full” ruining the moment.
Bonus tip: Shrink media before upload using tools from our Top Free YouTube Downloader List or learn How to Extract Audio from Videos to save precious space.Security Tips for Your Apple ID
Locking down my Apple ID isn’t just smart—it’s survival. Here’s how I armor-plate mine. Two-factor authentication? Non-negotiable. I turned it on after a friend’s Netflix got hijacked—now even with my password, hackers need physical access to my dusty iPad mini to breach my account.
My passwords look like alphabet soup. I mash random words, numbers, and symbols even my spouse can’t guess. “Pineapple7$Umbrella?Fish!” beats “Password123” any day. Bonus: Password managers are lifesavers. Mine spits out and remembers these chaotic combos so I don’t have to.
Phishing scams? Almost got me last April. A text pretending to be Apple Support asked for my ID details. Now I treat unsolicited messages like telemarketers—swipe delete instantly. Real Apple emails? They never beg for login info.
I used to groan at iOS updates. Then a tech-savvy cousin explained they patch security holes. Now I install them while brewing morning coffee. Check your login locations monthly—I once spotted a sign-in from another state and nuked that session faster than a microwave burrito.
App permissions get the third degree. Why does a flashlight app need my contacts? Denied. Face ID became my best friend—quicker than typing passwords and way cooler.
After hearing horror stories of surprise app purchases, I scan my account activity weekly. Found a suspicious $4.99 charge last month—turned out to be my kid buying Roblox bucks. Crisis averted.
Old devices are backdoors. I purge unused gadgets from my account like spring cleaning. That iPhone 6 in my junk drawer? Removed it before selling for $50.
See something fishy? Apple Support gets a call ASAP. Last year, a password reset flood hit my inbox. Their team locked my account tighter than Fort Knox within minutes.
Bottom line: Treat your Apple ID like your social security number. Guard it fiercely, update relentlessly, and never get complacent. Your digital life depends on it.